
Welcome Users of Sage 50 US who are looking for new tools

-
Where is it this tool from and what is it for
“Mail for Sage” (MFS) is the younger brother of “Bulk Mail for Acomba”. Acomba is the similar program to the Sage and is popular on the Quebec area of Canada. MFS belongs to inbound advertising tools and can help you in many situations. “Mail for Sage” can use any default e-mail server that is active on your computer. When ready it will send e-mails to the recipients that you have selected from Customers and/or Vendors. It is important than to collect the e-mail addresses. they are going to be your treasure in the future. The application is using the MS Word ability for mail merging. it is not going to block you computer during process of sending. when you prepare the newsletter make sure that your images are as small as possible. They are just for display on the screen so you don’t need any high density of the pixels per inch. I will try to explain more about in the future using separate article.
-
Everything starts with the data source
When the Data Source is made, the special variables are created from the heaters of the data columns. They can be used as the active tags which, during output are relatively exchanged for records of the recipients. It gives the user possibility of using the tags in the letter canvas, or to create envelops and even labels. There are many templates of the newsletters designed and given for free by Microsoft. You just have to add or replace text and/or images with yours and than assign appropriate source file with selected recipients, add the subject title and activate sending. everything will ve verified and sent. The same data source can be used multiple times but if it is necessary user can easily create new source and run it with new or existing documents.
-
Is it cheap or… expensive?
Currently there is good price for the program. You can’t own it but instead, you can buy the subscription for 1 year. Just compare it to the amount that you have to spend for advertising and divide the cost of the subscription per 12 months. What the most important is, the delivery of your newsletters or advertising flyers is made directly to you client. When you buy subscription all updates and new tools that are going to associate the “Mail for Sage” are going to be covered by the price. There are no restrictions for using the application and no restrictions for the number of sent e-mail when you are using the “Mail for Sage”. The limitation can be set by the Internet Provider but usually if that is the business Internet account the user doesn’t have any limitations for number of e-mail that could be sent. However, it is necessary that you ask the Internet Provider for the rules in order to avoid unnecessary complications. I experienced the situation when I sent more the 200 e-mail from the single account and the account was blocked in order to fight with the spammers. In that case the account was not business but for the individual users instead.
-
A few words about the Source Manager and its tools

The image above represents the Source Manager window. This is the place where the data that origins from the database is shaped and selected as required however if necessary the whole collection of the customers or vendors can be used as well. User has filter where can select the row of the records by parameters representing the data columns such Data ID, Name, E-mail and more.
-
catching e-mail errors
When the data source is prepared for sending the e-mails or the newsletters:
- it is extremely important that the e-mail address is valid.
- that the address has the appropriate patters.
That can be accomplished with the e-mail validation tools. When the tool find any problem the e-mail address can be modified. If you can’t fix the error in the address or its pattern you can remove entire rows that contains the problematic address. This way you avoid the problems during sending designated e-mails. Also, if any customers or vendors don’t want to receive any e-mails they can be removed from the data source as well. If that is the permanent request the records of that user can be removed from display of the data with the special tools and never appear in data list of customers or vendors unless the setting is undone. It never affects the original data in the database.
-
A few words about the MS Word Add-in and its tools
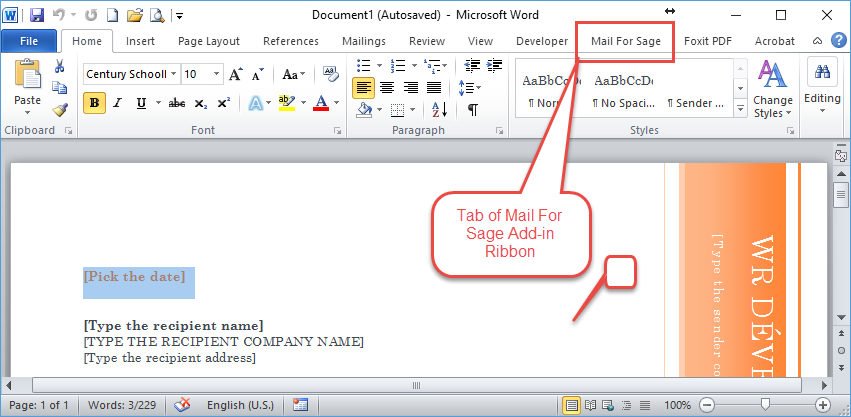

Images above display the MS Word application with the tab that is the part of Mail for Sage Add-in. when the tab is clicked the ribbon with the tools is appearing. Those tools are helping to set and activate the appropriate Data Source which is critical in the process of sending the e-mail or creating envelops. The special variables if used are replaced with related data what gives accurate and excellent personalization of e-mail, letters, or envelops.
Extremely Important <=> Extremely Important <=> Extremely Important
-
It have to be done for smooth run
First time when the Source Manager is loaded go to the Help Menu and select Add-in Activation.
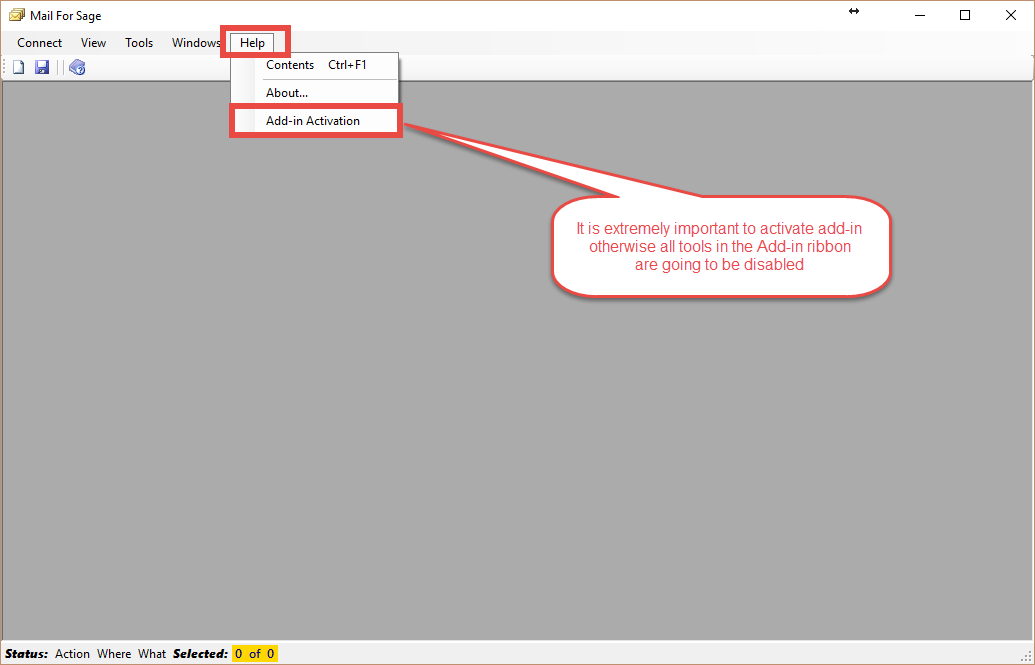
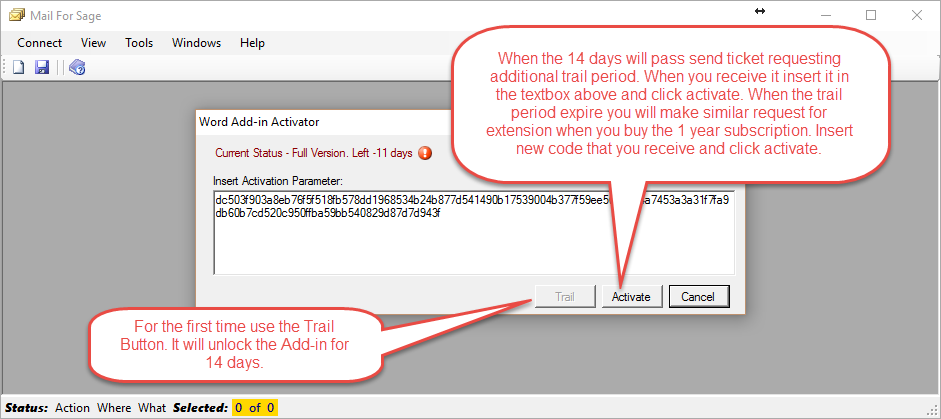
When the activation interface will appear and it is the first time click the Trail button. It will automatically activate the Add-in for two weeks. When the two will pass send the ticket with request for extending the trail. You will receive the code for additional extension of the trail that you should insert in the textbox and click Activate button. When you trail code expire you will have to buy the subscription of one year and when you receive it send the request ticket again with the prove of purchase the subscription. This time you will receive the code for activation that will cover a whole year as well. This time also insert it in the textbox replacing the old one and click Activate button. Now you are set for the period of one year.
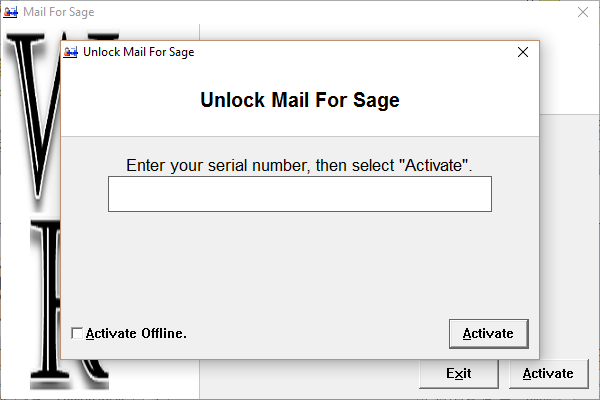
in order to activate the subscription you have to use the button that are located on the loading interface:
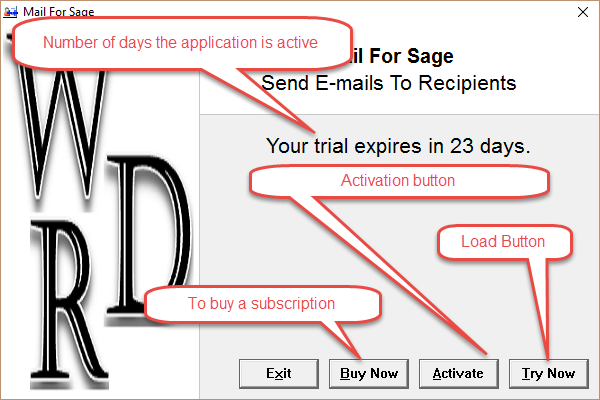
when you receive the activation code and you click the Activate button the small interface will appear where the subscription code has to be inserted: